Difference between revisions of "Time and Attendance Training"
| Line 235: | Line 235: | ||
''Camera'' – select your camera so you can take pictures and add them to employees. | ''Camera'' – select your camera so you can take pictures and add them to employees. | ||
| + | |||
| + | |||
| + | ='''Employee Main'''= | ||
| + | |||
| + | |||
| + | [[image:EmployeeMainTab.png]] | ||
| + | |||
| + | The Main tab contains the employee information needed to identify an employee and to ensure that the calculations will be correct. | ||
| + | |||
| + | [[image:EmployeeMainTabPage.png]] | ||
| + | |||
| + | ''Employee ID'' – this is generally the ID used in your payroll system. All employees must have a unique ID. A popup screen appears when you edit this field, and you cannot leave the popup screen until the ID is validated. | ||
| + | |||
| + | ''First Name, Middle Name, Last Name'' – these are editable fields for entering the employee’s full name. | ||
| + | |||
| + | ''Tag'' – a field to further identify or "tag" the employee, (useful when you have two employees with the same name). | ||
| + | |||
| + | ''Full Name'' – a display only field that displays the first name, initial, last name and tag fields, and is not editable. | ||
| + | |||
| + | ''Labor Levels'' – the employee's placement within each labor level defined in the software. | ||
| + | |||
| + | ''Pay Rule'' – a drop down list of pay rules. The pay rule determines the employee’s pay period, their rounding rules and how to calculate punches in relation to their schedule. | ||
| + | |||
| + | ''Base Schedule'' – a drop down list of base schedule groups. The base schedules include the start and end times, the break and lunch rules and the pay types to pay. | ||
| + | |||
| + | ''Holiday Group'' – a drop down list of holiday groups. The holiday group contains the list of holidays paid to the employee. | ||
| + | |||
| + | ''Accrual Group'' – a drop down list of accrual groups. The accrual group determines the number of hours that the employee accumulates based on the rules of that group. | ||
| + | |||
| + | ''Status'' – the employee’s current status. This is determined from the [[Employee Status|employee status history]]. | ||
| + | |||
| + | |||
| + | =''' | ||
Revision as of 18:13, 20 March 2018
Contents
Login
1. Start the Time and Attendance 3.5 software from the shortcut provided. If you do not have a shortcut then click here for instructions.
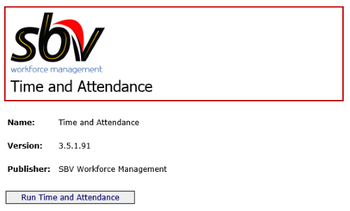
If you are using the web version of the Time and Attendance software and your shortcut is to a website then you will see:
If your shortcut is to the web based application file (Ta.WinAdmin.application) then it will skip to step 3.
If your shortcut is to a locally deployed application within your network then you can skip to step 6.
2. Click on Install Time and Attendance.
If you are using Internet Explorer you can skip to step 3. If you are using Chrome as your browser, you will be prompted as follows at the bottom of the browser.
Click on Keep and after a quick download click on the Ta.WinAdmin.application.
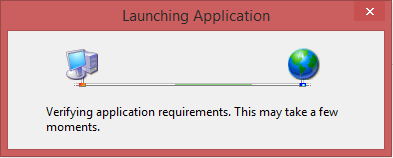
3. The Launching Application screen will appear.
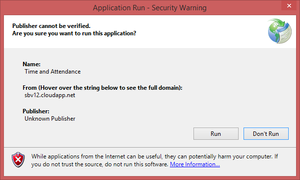
4. After a few seconds the Application Run – Security Warning screen will appear.
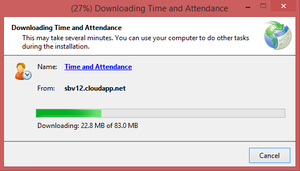
5. Click on Run and the software will start to download.
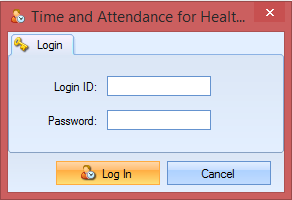
6. After downloading the Login screen will appear.
Enter your Login ID and Password and click on the Log In button or press the Enter key. After successfully logging in, you will be taken to the main screen.
Please note that until the first user is setup, the software will allow access without a login ID and password.
On subsequent starts of the web based version of the software you will go from the Install Time and Attendance button directly to the Login screen. If there is an update of your software then you will be prompted again with the Application Run – Security Warning screen and the updated version of the software will be downloaded.
If you are having trouble logging in, please click here for help.
Employees
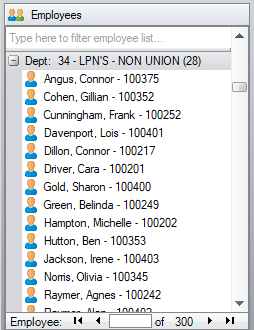
The employees list displays down the left side of the screen. Select the Home tab to return to this employees based view, if you have displayed the Scheduler or one of the Configuration screens. The top row of the employees list is a filter row. Type in part of an employee's name or their employee ID and press Enter to filter the list to employees that contain any part of the entered text.
Customize the employees list to display the employees with grouping and in the desired order in User Preferences.
You can highlight employees based on the employee have hours, exceptions or placeholders.
Employees Group
The employees group is the first group in the Home tab. You access the following employee-based commands from this group.
- Add Employee – add a new employee.
- Find Employee – search for an employee based on various criteria including clock ID and Social Security Number.
- Highlight / Filter – highlight employees based on exceptions and placeholders.
- Collapse – collapse the employee list to display only the group headers while keeping the currently selected employee visible.
- Expand – expand all groups so as to display all employees.
- Refresh – retrieve an up to date list of the employees if other users have added employees.
- Display Older Data – toggles the date based filtering of older time card and schedule information.
- User Preferences – change the way that employees are grouped or filtered, plus other display options.
Add Employee
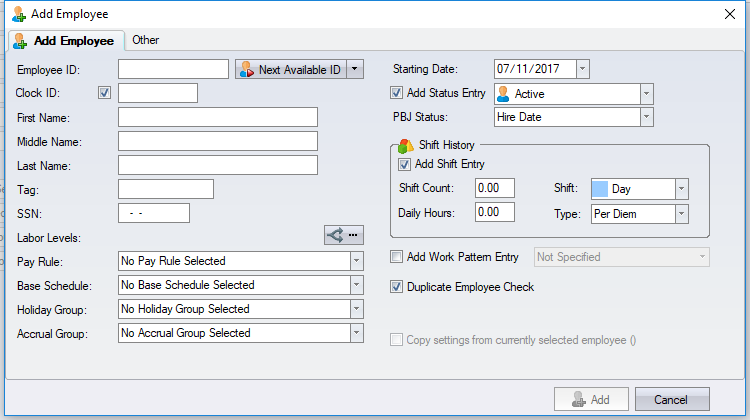
Click on Add Employee to open the Add Employee screen.
Employee ID – this must be unique and is validated to ensure that another employee is not already using this ID.
Next Available ID – provides the next higher numbered ID, or use the drop down button to enter an ID as a starting point.
Clock ID – the ID used at the time clock. If the employee is non-punching, then uncheck the checkbox. The clock ID must be unique and is validated, so if the software finds a duplicate clock ID, it will add the employee, but will not add the clock ID. A popup message will inform you of this.
First Name – enter the employee's first name here.
Last Name – enter the employee's last name here.
SSN – enter it here if you want to validate the uniqueness of an employee by their SSN.
Labor Levels – the employee’s home labor levels. Entered in the Main tab if not entered on this screen. If your authorization only allows you to add employees into certain labor levels, then you will need to enter the labor levels in order to enable the Add button. Click on the ![]() button for the labor levels selection screen.
button for the labor levels selection screen.
Copy settings from currently selected employee – this will copy the labor levels, pay rule, base schedule, holiday group, accrual group and work pattern information settings from the currently selected employee, and assign the next available ID. Please note that no personal information will copy to the new employee.
Duplicate Employee Check – performs a check by name and SSN to identify possible duplicate entry of an existing employee. If the software finds a matching employee, but it is not a duplicate (for example, two employees have identical names), then you will need to uncheck this before clicking the Add button.
Starting Date – used as the date for the status, shift history and work pattern information.
Add Active Status Entry – adds an Active entry into the employee's status information using the Starting Date.
Add Shift Entry – adds an entry into the employee's shift history using the Shift Count, Daily Hours, Shift and Starting Date information.
Add Work Pattern Entry – adds an entry into the employee's Work Pattern information using the Starting Date. If an employee is part of the Scheduler, then select "Soft Scheduler" or "Scheduler".
Add Button
The Add button enables once you have entered the required employee information. The Employee ID and Clock ID are validated to ensure that they are both unique. The employee will not be added if another employee already uses this Employee ID. The employee will be added, but the clock ID will not be added if the clock ID is already used by another employee. In this situation, a popup message displays.
After adding the employee, the Add Employee screen will close and the employee is added to the employee list, and is automatically selected. Enter any additional employee information that you are maintaining.
Find Employee
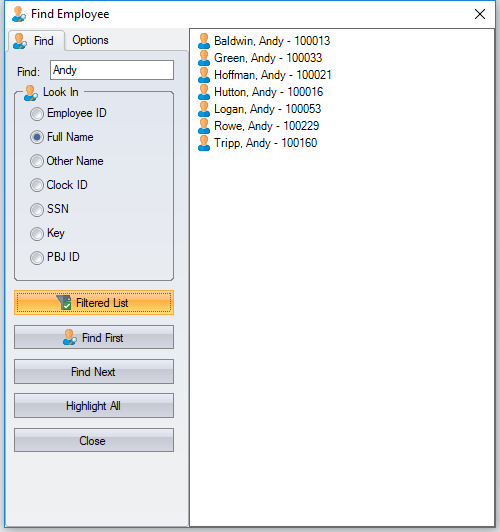
The Find Employee screen searches for employees in various ways and with various criteria.
Find
Filtered List
Based on the Find value and the Look In type selected, a filtered list of employees displays. Clicking on an employee selects that employee in the employee list.
Find First / Find Next
Based on the Find value and the Look In type selected, you can move sequentially through the employee list until no more employees match the criteria.
Highlight All/ Unhighlight
Based on the Find value and the Look In type selected, highlight all employees that match the criteria.
Options
Employee Status Filtering – only employees in a status that is set to display by default will be included in searching unless you select other status types. If the found employee is not currently displayed in the employee list, then you will need to make them visible first.
Sort Order – sorts the list of employees by the employee ID, the employee name, or the best matching value. The best matching value sorts those employees that start with the value you are looking for, before employees that contain or end with the value you are looking for. For example, when looking for "berg," Bergman would come before Goldberg.
Default On Enter Key – pressing the Enter key can be set to be the equivalent of clicking the Filtered List button or clicking the Find First button.
User Prefrences
The User Preferences allow you to customize and personalize how information is visually organized and displayed.
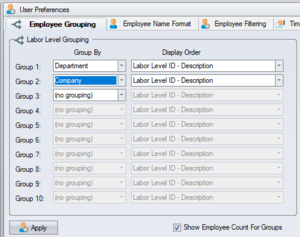
Employee Grouping
Employee grouping lets you organize the employees into a hierarchical based view, grouped by one or more of the labor levels. You can choose to display the labor level ID and/or the labor level description in the group headers, and sort by the labor level ID, the description, or the sort order assigned to the labor level.
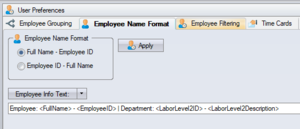
Employee Name Format
Employee List Name Format
Display the employee name with the employee ID before or after the employee name. The name format will affect how the employees sort, so choose the format that presents the employees in the order that you find easier to work with.
Employee Info Text
The employee information shown in the caption bar can be customized (the caption bar in the picture below is where "User Preferences" is displayed). It uses merge fields like you do when making merge letters. Position your cursor in the text box and from the arrow on the Employee Info Text button, select one of the merge fields. The merge fields are replaced by the selected employee's information.
For example "Emp # <EmployeeID> - <FirstName> <LastName>." will display as "Emp # 12345 - Joe Smith." when you click on the employee Joe Smith.
A list of all available merge fields is here.
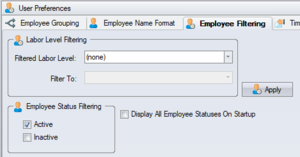
Employee Filtering
Labor Level Filtering
You can filter the employee list to one labor level item within a particular labor level. For example, if you have a large number of employees across many companies, then you can filter the employee list to a single company.
Employee Status Filtering
Every employee has a current status. A status is configured to either display or not display by default. For example, the Active status typically displays by default, while the Inactive status typically does not display by default. Click the Apply button after selecting the Employee Statuses you wish to view.
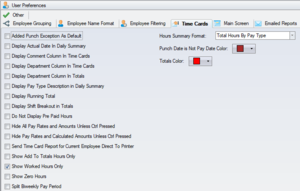
Time Cards Preferences
There are four different formats for displaying the hour totals on screen and in the time card reports. These are:
- Total Hours, e.g. 14.00
- Total Hours by Pay Type, e.g. 7.00 REG 7.00 OT
- Total Hours by Shift, e.g. 7.00 (AM) 7.00 (PM)
- Total Hours by Pay Type and Shift, e.g. 7.00 REG (AM) 7.00 OT (PM)
You can select a different format for on screen and for the time card reports format.
Show Worked Hours Only – this will eliminate pay types like holiday and vacation from the hour totals. The employee totals will show all pay types.
Show Add To Totals Hours Only – this will eliminate pay types like differentials (if the differential matches regular hours) from being in the hour totals. The employee totals will show all pay types.
Do Not Display Pre Paid Hours – this will eliminate Other Hours that were marked as Pre Paid from appearing in the hours totals. The employee totals will show all pay types.
Display Actual Date In Daily Summary – allows the actual date to be displayed in the daily totals in a column next to the pay date.
Main Screen Preferences
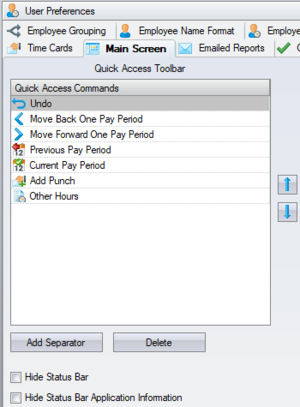
Quick Access Commands – sort and delete the Quick Access commands. A separator can be inserted between commands to organize them.
Hide Status Bar – the status bar can be hidden, e.g. you have a smaller screen and screen space is tight.
Emailed Reports
When scheduling automated report emails they will be send from a main generic email address e.g. (YourFacility@mysbv.com), so replies will be ignored. If you want to get the replies, you can enter your own email address here. You can also change the subject and default message.
Other
Always Display Accrual Balances – this will display accrual balances on top of the employee's time card.
Modal Pivot Grid – this may help prevent the pivot grid report from freezing.
Use New Scheduler –
Camera – select your camera so you can take pictures and add them to employees.
Employee Main
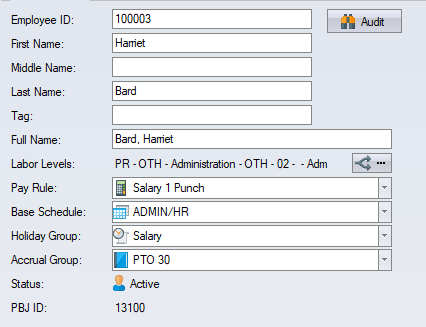
The Main tab contains the employee information needed to identify an employee and to ensure that the calculations will be correct.
Employee ID – this is generally the ID used in your payroll system. All employees must have a unique ID. A popup screen appears when you edit this field, and you cannot leave the popup screen until the ID is validated.
First Name, Middle Name, Last Name – these are editable fields for entering the employee’s full name.
Tag – a field to further identify or "tag" the employee, (useful when you have two employees with the same name).
Full Name – a display only field that displays the first name, initial, last name and tag fields, and is not editable.
Labor Levels – the employee's placement within each labor level defined in the software.
Pay Rule – a drop down list of pay rules. The pay rule determines the employee’s pay period, their rounding rules and how to calculate punches in relation to their schedule.
Base Schedule – a drop down list of base schedule groups. The base schedules include the start and end times, the break and lunch rules and the pay types to pay.
Holiday Group – a drop down list of holiday groups. The holiday group contains the list of holidays paid to the employee.
Accrual Group – a drop down list of accrual groups. The accrual group determines the number of hours that the employee accumulates based on the rules of that group.
Status – the employee’s current status. This is determined from the employee status history.
=
